Articles | Photoshop blog | Photography blog | about me | e-mail

Helen Bradley - MS Office Tips, Tricks & Tutorials

Wednesday, October 22, 2008

OneNote - Send it to me!
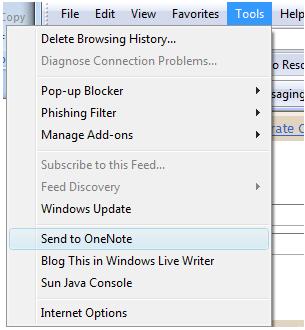

OneNote is one of those underused applications which really should have a place in everyone's day.

Planning a trip? Researching a topic? almost anything you are doing, OneNote should have a place in your toolkit. With OneNote 2007 installed you have better than ever integration between OneNote and, for example, Internet Explorer or Word. In Internet Explorer, find a site you like and which you want to keep the information from and you can. With the page visible, choose Tools > Send to OneNote and Internet Explorer sends the page contents and the URL to a new page in a OneNote notebook. It's all stored ready for you to use when the time comes you need the information.

It's fast and smart.

In Word 2007 you have a OneNote printer. Open a document and choose to Print it but this time, select the Send to OneNote 2007 printer and the document gets sent automatically to OneNote.

It's a great place to store all your stuff, check it out. It was, from its inception a fantastic piece of programming and a leader in its field. It rocks even more in the new 2007 version.

Labels: , ,

Add to Technorati Favorites

Wednesday, October 15, 2008

Better character spacing in Word


First the explanation:
Look at any book and the characters in it don't look quite like those you print on your printer. The reason? the characters in the book are placed closer together than those on your printed page.

Now the technical stuff:
Character spacing is the amount of space between characters of type. If you reduce the amount of spacing just a bit, you get a nicer look to your font, it just looks that little bit more professional.

Now the how to big:
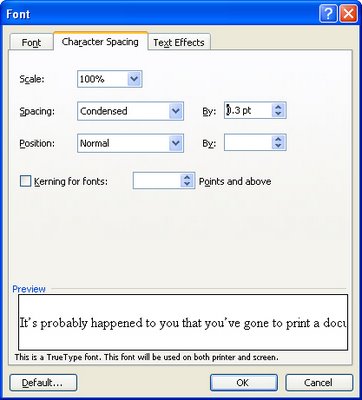
To alter the spacing between characters, select the text to alter and select Format > Font > Character Spacing tab. From the Spacing list box select Condensed and in the By: textbox set the reduced spacing value to somewhere between .1 pt and .3 pt - the results will be subtle but noticeable and your text will look lots nicer.

Labels: , ,

Add to Technorati Favorites

Friday, October 3, 2008

Borderless printing in Microsoft Publisher - Yay or Nay?

Before you go looking for borderless printing and margin settings in Publisher 2003 - give up - they're not there.

Simply put, Publisher does not do borderless printing.

While on the face of it this is a nuisance, to say the least, there is a workaround that will get you going. Here's how:

1 First of all set up your Publisher document so that it has everything on it that you want to print borderless. For example, I like to, when I’m using a template for a calendar, for example, stretch the background filled shape to fill the entire document so that there is color all the way to the border.

2 Save the document as a publication (*.pub) file so that you can come back to it later on if necessary and edit it.

3 Now create the print version - to do this, save the document as an image. Choose File > Save As and from the Save as Type dropdown list choose an image format such as Tagged Image File (*.tif) and give the file a name.

4 Now crank up your graphics software, set up your printer using the printing options for borderless printing and print the image.

Not pretty but it works!

Labels: , ,

Add to Technorati Favorites