Articles | Photoshop blog | Photography blog | about me | e-mail

Helen Bradley - MS Office Tips, Tricks & Tutorials

Tuesday, September 22, 2009

Outlook - Disable Contact Editing
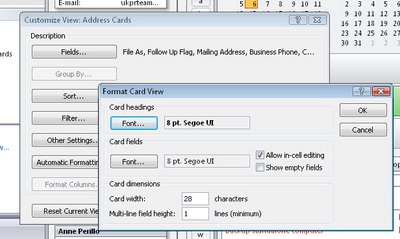
By default in Outlook 2007 you can edit your contact information from any view including the Contact card view.

If you find yourself making changes by accident you can disable this feature so that contacts can only be edited by opening the Contact's information dialog.

To do this, select the Contacts folder and display the view you don't want to be able to edit in. Choose View > Current View > Customize Current View > Other Settings and disable the 'Allow in-cell editing' checkbox.

Now you can look at the contacts but you won't be able to change them without switching to another view.

Labels: , ,

Add to Technorati Favorites

Wednesday, September 16, 2009

Outlook Send a Contact's details via Email

To share an Outlook Contact's details with someone else you can send it via e-mail.

This lets you get the details you have recorded about a contact to someone else without having to pull all the details across manually. It's simple and quick.

To do this, select the Contacts module and open it. Double click to open the contact's details that you want to send to someone.

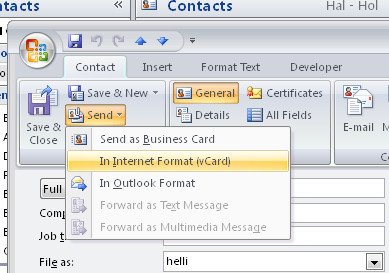
From the Contact tab on the Ribbon click the Send dropdown list and choose In Internet Format (vCard).

This opens a new message dialog with the details attached in a .vcf format file. All you need to do is to enter the recipient's email address and your message and click Send.

When the recipient receives the message, they can click the attachment to open it and add the person's details automatically to their Contacts list.

Labels: , , ,

Add to Technorati Favorites

Thursday, September 10, 2009

Outlook 2007 - Create a Custom e-mail merge

When you need to email lots of people at a time, such as your business contact list you can do this from inside Outlook.

To do this, first open your Contacts area and select the Contacts to email as a group. You can do this by Control + Clicking on each contact to select them.

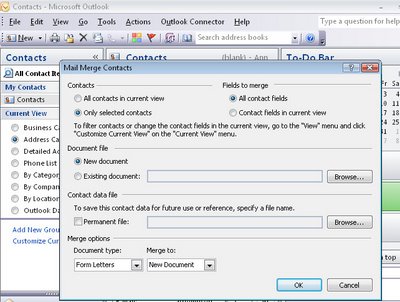
Then select Tools > Mail Merge to create the message. Choose Only Selected Contacts and then select whether to create a printed document or to email it and then click Ok to switch to Word to finish the process there.

Labels: , , ,

Add to Technorati Favorites

Thursday, September 3, 2009

Create a Distribution List in Outlook


When you regularly email a lot of people at once, it makes sense to assemble a distribution list to simplify the task. Then you can send the email to all the people in the list in one step, rather than having to select each member individually.

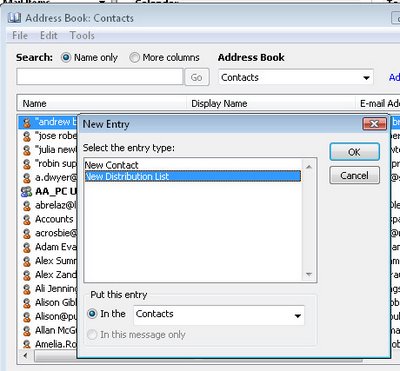
To create a distribution list in Outlook, select Tools > Address Book and choose File > New Entry.
From the "Select the entry type" list select New Distribution List.In the "Put this entry" area, select Contacts and click OK.

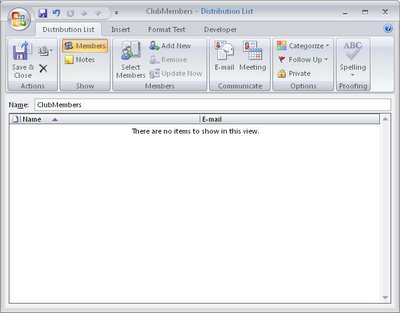
Give your list a name and, to add members to it from your existing Contacts, click the Select Members button. Double click the members in the dialog to add them to the Members area at the foot of the dialog. When you're done, click Ok.

To add the details of someone who isn't in your existing Contacts, click the Add New button, then type their details into the dialog.

When you're done, click Save & Close to finish.

In future you can add the list name to the To area in an outgoing email to send the email to the list members, or better still, include it in the BCC line to keep the members secret from each other.

Labels: , , ,

Add to Technorati Favorites